Custom Animal Quilts

I’ve been pretty preoccupied these past few months. No surprise that it has taken me this long to post this. I learned that I was going to be an aunt, and I decided to fly to Malaysia to visit my sister. Very interesting times at the moment and it would be even more interesting in the near future! Did so much baby clothes shopping! There are so much out there and they are so cute!!

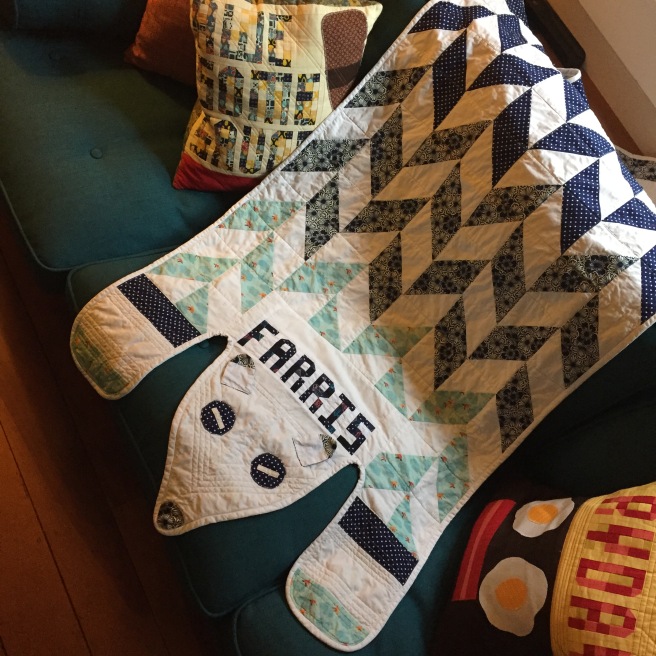
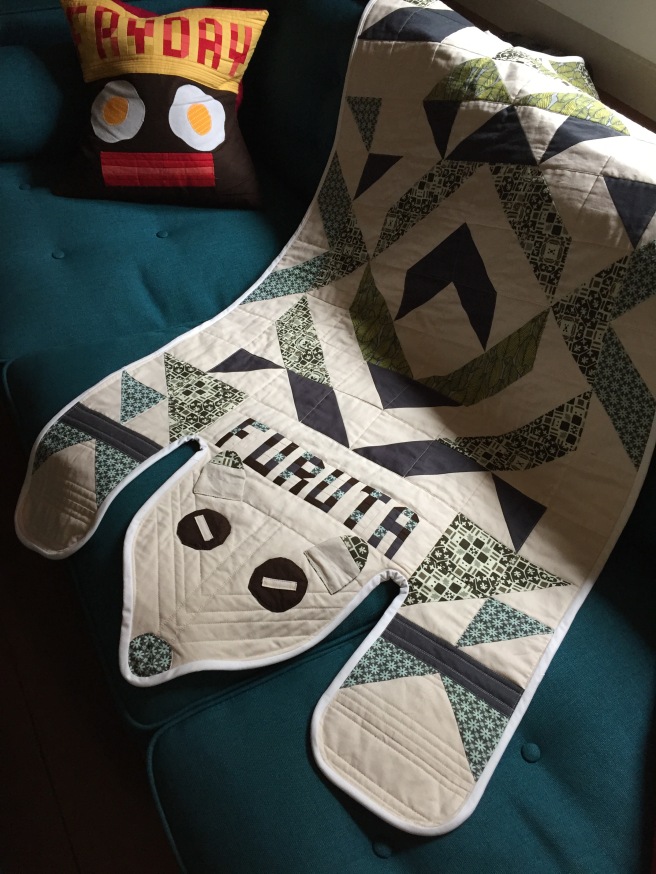
For now, let me get back on track with these two lovely animal quilts that I have been commissioned to make. We wanted to make it more personal by incorporating their names into the quilt. Usually these are stitched on, but I wanted to incorporate my typography tile method into these two quilts. It was fun to do, and it is one of a kind – heirloom quilts to treasure. It can be used as a cot and toddler blanket, a play mat, changing mat and ultimately, it can be a wall hanging.

Egg Quilts Animal Quilts Egg Quilts Animal Quilts Egg Quilts Animal Quilts Egg Quilts Animal Quilts Egg Quilts Animal Quilts Egg Quilts Animal Quilts

Quilt wall lovin’

We have had the same furniture and same stuffy arrangement in our house for ages. I think part of growing into your 30s is an appreciation for form and function and the need to declutter. I remembered how much I rated bean bags as an alternative seating arrangement in my 20s. We sold out couches two weeks back and had to use bean bags in between couches. It was excruciating. How I use to do it in my 20s, I don’t know…

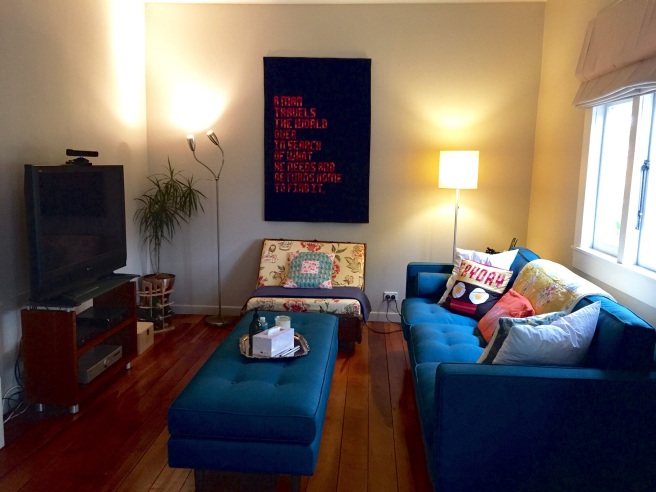
The living room is by no means done, there are still things to do – the devil is after all in the details. However! I am so glad to say that I have completed the centre piece of this living room makeover! My wall quilt is finished!! I have to say that this is my favourite quilt to date. It has its modern simplistic charm…a mix of love for typography and craft. I don’t remember how many pieces there were, but every letter was made of 1.25″ sewn together square blocks.

I love the ‘home’ quote and to top it off, we have our trusty dog put everything into perspective. She is after all my home 😀

2015/01/img_5482.jpg

2015/01/img_5483.jpg

2015/01/img_5479.jpg

Steamer Trunk Dog Bed

Summer is finally here at long last! It has been a hot and sunny couple of weeks, too hot to be sitting in the craft room piecing together a wall quilt. I haven’t abandoned the project completely but it is looking to be a slow finish.

However with that said, I have a few projects that have been sitting in the back burner for far too long. I needed outdoor space to spread out and dry weather. So this is what we ended up with! A very vintage stylish dog bed made from an old steamer trunk. I have seen this type of project on Pinterest years ago and I loved the idea of upcycling an old trunk. This trunk has travelled all the way from South Africa back in 50s/60s. I can’t trace the exact voyage route for this trunk because the stamps have either peeled off or have been painted over. There are still some around complete with custom stamps, that you can trace its route all the way back to the port of departure. Isn’t that just wonderful? A little bit of history.

Eggquilts_steamertrunk_dogbed Eggquilts_steamertrunk_dogbed_sparkyThis was my first try at upholstery. I went a little trigger happy with the stapler gun, only because it was so much fun. The fabric was bought from Martha’s Fabric. I think the dog is pretty chuffed with her new bed, no?

I did sit on it myself and I have to say, it is also pretty sturdy as a chair, although I might not lean on it completely because the trunk is pretty old and tatty and would need reinforcements if you’re thinking about making it into a chair.

All in all, the main lesson that I have learnt from making this project is to have EVERYTHING at hand. It doesn’t take long to finish the project as long as you have all the tools and materials sourced, sussed and next to you.

Typography Wall Quilt

Recently, I have done more and more typographical pieces. I enjoy constructing type with patchwork craftiness. I am on the verge of updating my living room and I am coming up with ideas on what to do with the walls. I don’t really want to repaint the walls with a feature colour, what we have currently is perfectly fine. With that said, I do want a little something that will give my small living space a spruce up, preferably with a subtle hint of bohemian cosiness. I have never done a quilt for hanging ever before and thought, wouldn’t it be fun to have a largish quilt as the centrepiece of the wall? I’ve narrowed down my choices to the picture below. Now, fingers crossed, it will come together and look exactly as drawn!!eggquilts_suestrobel_typography_quilt

You’re going to need these.

It is important to have the basic tools to ease you into your project. There is nothing more exasperating than having your momentum stopped because you’re missing a thing or two.

When I started my first quilt, the only tools I had were a tiny cutting mat, 8.5” quilt ruler, rotary cutter, scissors, pins, thread and sewing needles. I began by hand sewing because I wasn’t sure if this was for me and I wasn’t going to invest on something that I wasn’t sure about. Ridiculous, right? A few years on and I have a room stocked up with quite a bit of gear. And as much fun as hand sewing was, I was pretty lucky to receive a sewing machine that Christmas. It was definitely quicker with a sewing machine!

I guess what I’m trying to say is, you can always start small, get some fat quarters and test the waters to see if this is for you.

Here are the basics that have helped me along the way:Eggquilts_suestrobel_tools

  • A good sewing machine with interchangeable foot capability.
  • ¼ inch sewing machine foot
  • Walking foot
  • Hand sewing and machine quilting needles (change needles for every new project or after 10-12 hours of use)
  • Tape measurer
  • Quilting ruler
  • Scissors
  • Seam ripper
  • Pins
  • Cotton thread
  • Basting spray
  • Masking tape
  • Self-healing cutting mat
  • Steam iron and ironing board

Beginners 16″ Octagonal Nine Patch Cushion Cover

This is a pretty quick and easy project. You’d be able to get this done in an hour or two, which makes it so gratifying and fun! It’s also a great platform to start and see if patchwork is for you. Let’s begin!

eggquilts_octagon
A) Background fabric B) Front fabric

For material, you will need 5 fat quarters (18″ x 22″) and 18″ square batting:

  • 2 fat quarters for patchwork (front and background)
  • 1 fat quarter for the backing for the quilt sandwich (this will be inside of the cover, so you wouldn’t need anything fancy)
  • 2 fat quarter for the cushion envelope
  • 1 square of batting measuring 18″ x 18″
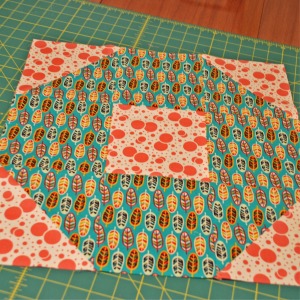
eggquilts_octagon2
Cut “Square 1” diagonally to make triangles.

Cutting for patchwork:

  1. Square 1 (cut into squares and then cut diagonally in half to form triangles):
    1. 2 square cuts of front fabric
    2. 2 square cuts of background fabric
  2. Square 2:
    1. 4 square cuts of front fabric
    2. 1 square cut of background fabric
  3. Cushion envelope (these are to overlap for the back of the cushion to form an envelope):
    1. 1 cut of 11″x 18″
    2. 1 cut of 13.5″ x 18″
  4. Batting (my preference is always either cotton or bamboo):
    1. 1 square cut of 18″ x 18″

Instructions:

Eggquilts_suestrobel_octagon_quilt2
Change your machine foot to a 1/4 inch foot. Start by piecing the triangles. Pair a front fabric and a background fabric, right sides together and pin along the diagonal line. Then start sewing a 1/4 inch seam along the diagonal part of the triangle.
Eggquilts_suestrobel_octagon_quilt3
Bring the sewn pieces to the ironing board and press it towards the dark (darker fabric).
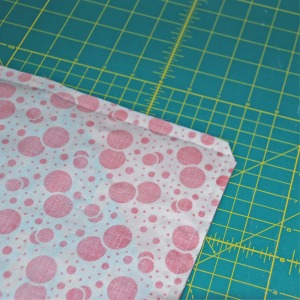
Eggquilts_suestrobel_octagon_quilt4
Square the pieces. You want to trim away the pointy ends and square them up so it’s easier to piece the whole thing together. Using the block pattern above as a guide, lay out your squares to create the octagonal shape.
Eggquilts_suestrobel_octagon_quilt5
Stitch these together in blocks of three. Bring these back to the ironing board and press the first and third row in one direction and the second in the opposite direction. This will allow the seams to nest nicely when you piece them together.
Eggquilts_suestrobel_octagon_quilt6
Once again, bring it to the ironing board, press and square the block. Tada! Patchwork part is complete! You are half way to having your very own handmade cushion cover my friend!
Eggquilts_suestrobel_octagon_quilt7
Now we want to create a “sandwich” for the quilting portion. Smooth out the backing fabric, right side facing down, and spray it with some basting spray. Place the batting on top, smooth it out and spray more basting spray and place the patchwork on top of it. Smooth it out.
Eggquilts_suestrobel_octagon_quilt8
I use basting sprays instead of pins because it is just so much easier! If it was a super large quilt, I would probably bast it with spray and put a few pins around to help with the weight. Quilt Basting sprays won’t harm your machine or your quilt. It’s washable. Just use it as per the instruction. Use, don’t abuse 🙂
Eggquilts_suestrobel_octagon_quilt9
Bust out the masking tape. Use the masking tape to mark the quilting lines. Screw on the walking foot and start the quilting process by sewing close to masking tape. These work as guides, I ended up sewing more lines than these to make sure that my batting sits nicely in this quilt sandwich. Once again, square off the excess material. There you have it! Your first quilt sandwich!!
Eggquilts_suestrobel_octagon_quilt10
For the cushion envelope, hem one side of each piece. Fold the length of the fabric and once again onto itself. Press it well with the iron.
Eggquilts_suestrobel_octagon_quilt11
Sew the hems shut. I do it twice, once on the top and another on the bottom to make sure it wouldn’t stray.
Eggquilts_suestrobel_octagon_quilt12
Now this is the finisher! Bring back the quilt sandwich, right side up. Align the envelope pieces at the top and bottom of the quilt sandwich, right side down. These will overlap. I placed the wider piece on top of the shorter piece. Pin them down. Sew the edges together with a 3/8″ seam. Trim off excess material.
Eggquilts_suestrobel_octagon_quilt13
Trim off the edges of square and flip it inside out. Stuff it with a cushion and you are done! Since this is a 16″ cushion cover, you can stuff it with a 16″ cushion inner, unless you prefer a puffier looking cushion, in which case you can place in a 17″ inner.
Eggquilts_suestrobel_octagon_quilt14
Your first completed patchwork/quilting project! High fives all around!

I would love to hear from you and see the projects that you have done. I hope you’ve found this tutorial helpful and perhaps found a new love in quilting!

Awesome Sauce!

Scrap cushion cover completed! I got through this half way and noticed that it is another food related patchwork! Food is not just a nourishment, it is an obsession bordering on totalitarian. Based on my compulsion to make quilts and a love of food, I should have been a bear. Snuggle and eat. If it wasn’t for my trusty Labrador who takes me out for a walk everyday, I would be a bear right now. A very cuddly bear with a cool quilted jacket. Yeah!

Here’s Awesome Sauce!!!

eggquilts_suestrobel_awesomesauce1

Leo the animal quilt

I finished Leo last week and sent him on his way to his forever home. I didn’t want to put up any photos until his new owner gets to see him first hand. He arrived at his new pad today and I foresee a lot of snuggle time ahead for the both of them. I love making quilts and I love it more when other people love it too! Thank you Jessica for giving me this wonderful chance of making you an animal quilt.

And here is Leo! He is a lap quilt, with his body measuring at 30″ by 70″. He is sewn together using 100% high quality quilting cotton, cotton batting and cotton thread.
eggquilts_suestrobel_leo_animalquilt eggquilts_suestrobel_leo_animalquilt2 eggquilts_suestrobel_leo_animalquilt3 eggquilts_suestrobel_leo_animalquilt4

A little hoarding never hurt nobody.

I’m looking out my window and I see grey and rain. It seems like Auckland is having a hard time getting herself in gear towards summer. I have a semi-quiet week ahead of me and so I had some spearheading ‘self’ plans mapped out for this Monday. I was going to walk off the 3000+ calories ingested over the weekend at the Auckland Taste Festival (which was and still is the most amazing food fest I’ve been to to-date!), I was going to clear out the fridge and start some clean eating before Christmas, and fix up the garden. Alas, all of that would not be happening today.

However! I can’t complain. Because on days like this, I feel especially grateful that I have a craft room with enough fabric “hoardage” that I can submerge myself in some patchworking. I have always wanted a Missouri Star quilt. Today could be the day!eggquilts_hoardfabric